Abby’s Christening

After being invited to a friend’s baby’s Christening, I left thee invitation on our fridge for a few weeks. It was super cute so I was okay with that. When I did finally take it down, you know it didn’t go in the trash. Like any good scrapbooker, it sat in my 2013-to-scrap pile until I finally got around to putting it in the 2013 book.

I went with a soft pink paper to match the invitation perfectly, and then found a Lori Whitlock sticker that matched the colors just as much as the paper did. I inked the edges of the mats with pink ink because I wanted to fit as much pink as possible on to this page.

I switched to purple paper to make the title pop, but still backed it with pink paper.

I thought the page needed a little something extra, so I added some pastel translucent heart stickers all over the page.

Tag by K&COMPANY, mat paper is Wasau Textured Cardstock, stickers by Stickapotamus, background pink Cardstock was a gift, title made with SCAL and my Cricut, purple paper by Mambi. Long flower sticker by Lori Whitlock for Echo Park.

20130914-210055.jpg

20130914-210101.jpg

20130914-210109.jpg

20130914-210115.jpg

20130914-210121.jpg

Baby Abby

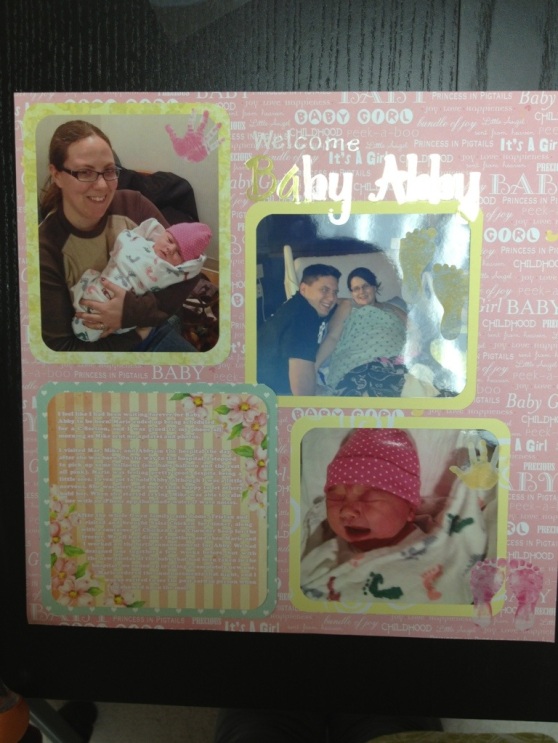
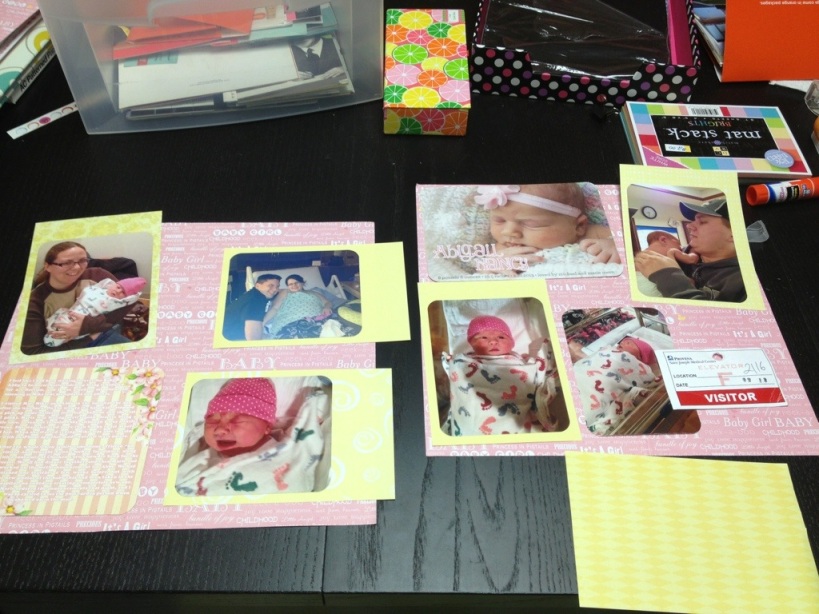
Back in February, my good friend had a little baby girl. Tab and I visited the new baby at the hospital, as well as at her home about two weeks later.

Of course, I had to snap iPhone photos of the new baby. But, when it came to scrapbooking, what could I do? Seeing as this is the first baby-friend I have, I didn’t have anything ‘baby’ themed in my scrapbook stash. Luckily, The Stack 5 had some baby boy & baby girl themed paper that I’d never used. I also picked up some baby hand and foot print stickers because I got them on super sale.

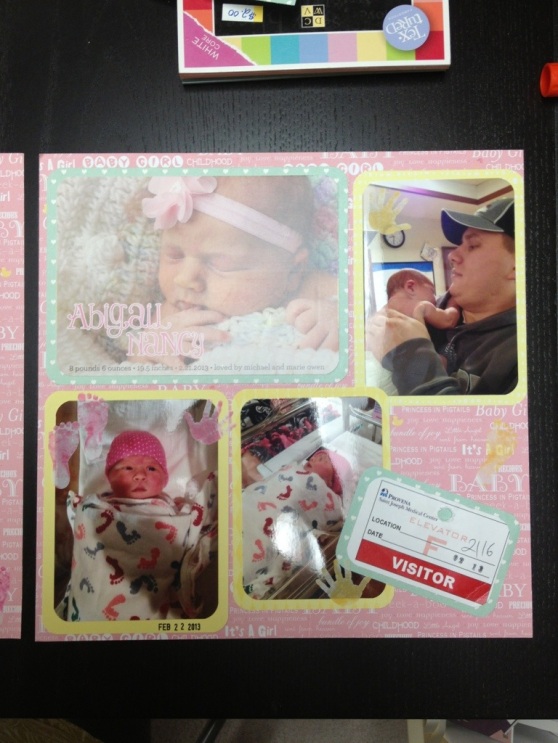
I didn’t do anything too fancy here, just matted the photos and adhered them to the page. I also included the birth announcement (and had to take it off my fridge where it’s been for a few months) and the visitor’s badge I received when I visited the hospital.

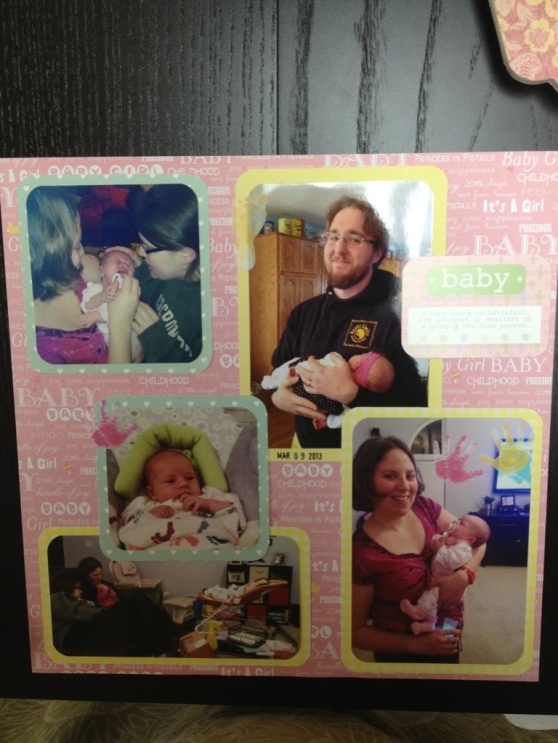
Seeing as we visited the baby a couple of weeks later at her home, and I included it in that block of journaling, I wanted to keep all of the photos together. I added a third page to my layout with the same background paper as the first two. I just used my date stamp so I’d be able to remember when the photos were taken.

20130819-211427.jpg

20130819-211435.jpg

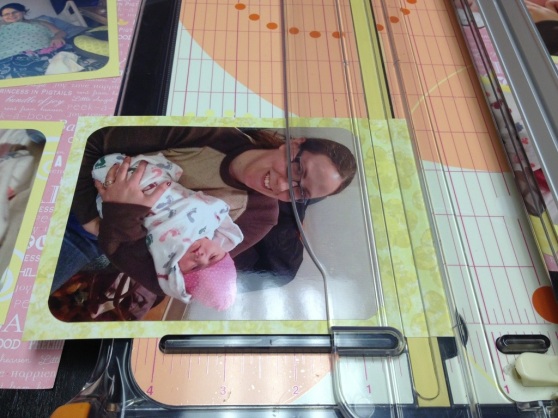
I mated the photos on yellow paper from a mat stack that had a few different patterns. My favorite was the one with yellow flowers. I liked the ‘water colory’ look of it. I used it for a photo of me holding the baby akwardly adorably.

20130819-211446.jpg

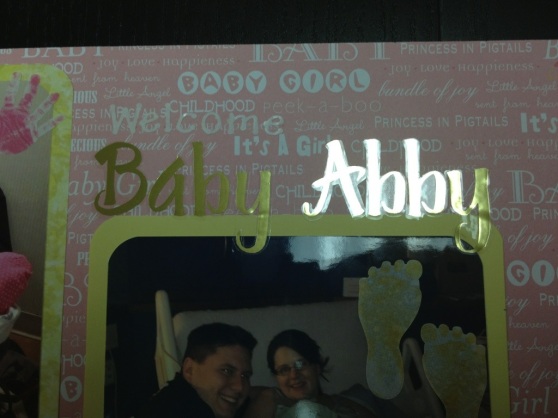
I typically like to do big titles (usually cut out with my Cricut), but here I used smaller letter stickers. I had covered up so much of the paper with all the photos, and the larger-than-normals mats, so I wanted to leave some of the paper showing through (so all the baby words could be seen). The gold letters worked perfectly for this.

20130819-211544.jpg

20130819-211457.jpg

Background paper from DCWV‘S The Stack 5, hand and feet stickers and gold letter stickers from Stickopotamus (which has no website?), yellow mat paper from Generation’s Stackers (the Pastel Color Collection) (no website but purchased from OfficeMax), journaling typed out in free download paper, green mat paper from Paper Pizazz about ten years ago. “Baby” card from a Miss Elizabeth‘s card stack that I can’t remember when I bought. I feel like its been sitting around here for a while, because the only cards left in the box are words I would never need (good thing I finally have a friend with a baby! Now I can use all those kid words).

20130819-211504.jpg

20130819-211511.jpg

20130819-214223.jpg

EG’s Birth Announcement

After Tab’s coworker gave birth to baby EG, we received a very cute announcement in the mail. The hardest part was choosing which side of the super cute announcement to use :).

After keeping the announcement up on the bulletin board in our kitchen for a super long time, I decided it was finally time to pull it down and put it in the ‘to scrapbook’ pile.

I immediately knew what paper I wanted to use because I knew the phrase “the most beautiful things” was perfect for a new baby girl. The paper has a cool glossy coating on the words (and the border as well).

The matting paper behind the photo was picked specifically for the heart paper. The hearts were a little too dark to match perfectly, but I still went for it because what do people heart more than new babies?! 🙂

The half inch border around the paper is dark purple with a little blue in it. To match that, I cut the letters out of purple paper and inked the edges of each letter with a dark blue ink pad.

The mats around the letters are a little too big, but I really wanted to see the hearts so I made the extra large. I would’ve gone back and made them a bit smaller, but I was out of heart paper. Oh, well. I’m over it ;-).

I cut the flowers out to match the flowers in the bottom left of the paper and also because I wanted to tie in that paper on the double mat somewhere.

Ink in color Dusk Blue by Martha, outline done with purple Sharpie pen, background page from DCWV‘S Mod-Retro stack, mat paper by Paper Pizazz, purple letter paper from the office supply store, letters & outlines cut with SCAL and Cricut, flowers cut from Cricut’s Elegant Cakes cartridge.

20130825-214254.jpg

20130825-214303.jpg

20130825-214225.jpg

20130825-214206.jpg

20130825-214245.jpg

Decorating Onesies

When an artist friend of Tab’s got pregnant, I knew I wanted to make a gift for the future baby. Sure, we bought some duckie pajamas, but I knew the artsy mama-to-be would appreciate something hand made.

Since I was trying something I’d never done before (freezer paper stenciling), I made sure to photograph the process. To be honest, I mostly took photos so I could share them with my mom ;-).

The paper here has images of sewing patterns on it. It’s super cute, and I thought patterns and decorating clothes wasn’t too big of a jump. I had to take a close up photo to showcase the paper.

I felt like the title didn’t stand out enough, so I added blue polka dots with a Sharpie Pen. The dots looked nice, but they didn’t do anything to help the title stand out so I outlined the letters with a thin black Sharpie.

Paper from DCWV’S Retro Mod Stack. It’s from 2009, but it’s totally legit. Mat paper is DCWV’S The Stack 5, letters cut with Cricut’s Cuttin Up cartridge. Journaling typed in the computer and printer on a free download card by Tortagialla (I lengthened the card myself.). Small date stop from Amazon, large date stamp by Creative Cafe.

20130820-221139.jpg

20130820-221211.jpg

20130820-221146.jpg

20130820-221218.jpg